A Beginner's Guide To Tile Patterns
- Brandi Oldham

- Jan 28, 2022
- 3 min read
Are you considering updating a kitchen backsplash,
installing a tile shower, or building a new home?
Then this article is for you!
Many of my clients spend time on Pinterest, Instagram, and Houzz trying to find the perfect inspiration picture for their dream kitchen, bathroom, or accent wall. They have the look, but often can't explain the tile pattern to their contractor or designer.
Not anymore!
Today I am breaking down some of the most common tile patterns.
Let's get started....

1) Brickset
A brickset pattern is a common pattern seen with subway tile. As you can see here, each row is offset at the halfway point of the tile above and below. This pattern is timeless and one that is well received in many different applications.
If applying brick or another textured tile this pattern can create a more industrial look in your space.

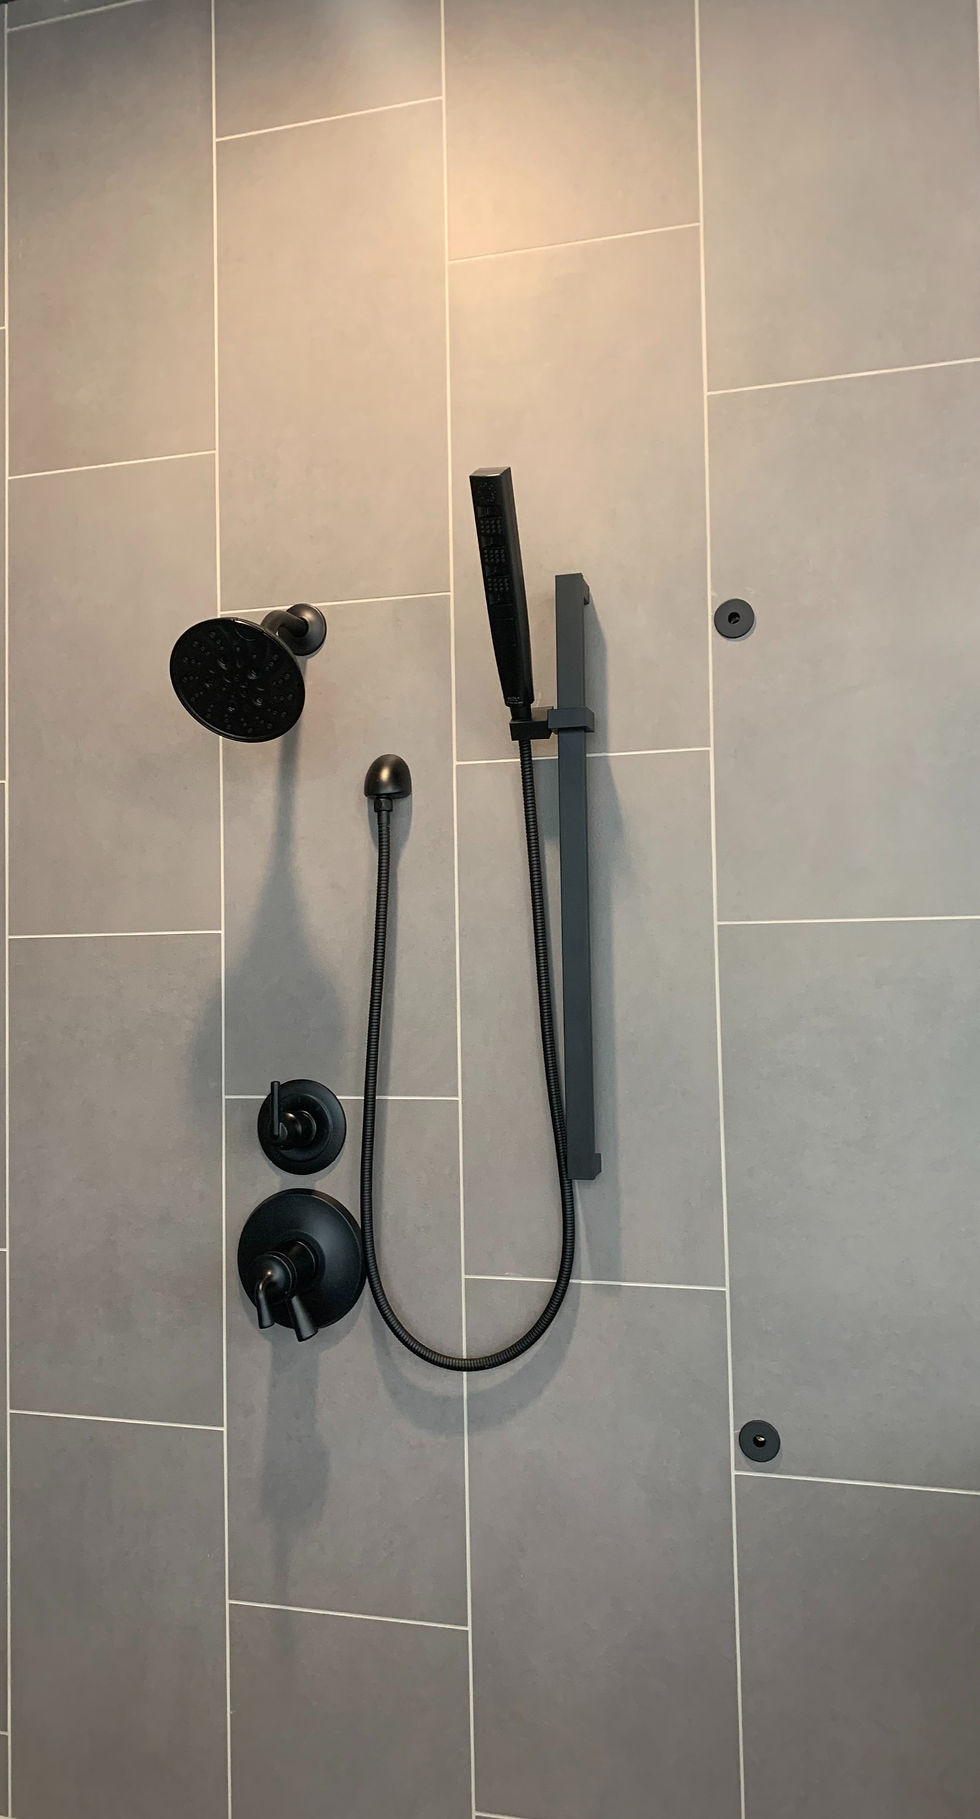
2) 1/3 Offset
This pattern is a slight variation of the more traditional brickset pattern (shown above). With this pattern, tile is placed at the 1/3 line and is repeated on every 3rd row.
This pattern can be used with traditional subway tile as well as with large format tile. I personally love this pattern for large format tile. As you can see here, the vertical 1/3 offset pattern makes this shower unit appear taller and more expansive.
Want to see this tile in person? Check out the floor display at the 3rd Avenue Design Center in Camas, WA. Let them know Brandi sent you!
This shower display also showcases the Airmada system. The black circles you see in this photo push out air to dry your shower after each use. It's AMAZING!

3) Herringbone
Want a tile pattern that gives the illusion of texture? Herringbone may be the right choice for you!
Herringbone gives the illusion that the tiles are woven in together. I love this tile pattern on the back of a large wall as a statement piece (as you see here). I also love this pattern on the floor of a utility or mudroom. It adds a nice statement while still bridging the gap between the interior of the home and outdoor spaces.

4) Chevron
The chevron tile pattern is similar to the herringbone, but has a little more of a modern spin!
If your tile is not specifically formatted for this pattern you will likely need to have the tile ends cut at a 45 degree angle to achieve this look.
While this pattern can be stunning, you also need to be mindful of the busyness that it can bring to a space. As you can see here the light neutral tones eliminate some of the visual chaos to the viewer.

5) Stacked Vertical
Stacked tile patterns will always lean a little more modern compared to their offset counterparts.
Stacked vertical patterns are a great way to make areas appear taller and more expansive. I love the stacked vertical look in both a large format tile and in a thinner subway tile. The thinner subway tile can give a very fun bistro vibe to your kitchen or dining space!
As you can see in this photo, this pattern pairs very well with smaller details such as the penny tile in the back of the shower niche. The vertical pattern supports the visual interest of the smaller pattern.
Love this shower? I designed it! You can find this shower at Hotel Stevenson!

6) Stacked Horizontal
Just like the stacked vertical pattern the stacked horizontal pattern also leans a little more modern. This tile pattern is great for visually clean lines and can make narrow spaces appear wider if using a smaller tile (as seen here). I love this look behind a bathtub or behind open shelving in a kitchen.
Not sure where to start with your next tile project? Contact me!
I offer by-the-hour tile consultations for both residential and commercial spaces.
For these appointments I join you at your preferred tile store and together we make a tile selection that fits the layout, color palette, and style of your space.
Want to be notified when a new blog is published? Sign up here!


Comments